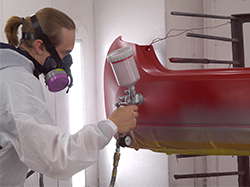
We help people repair plastic
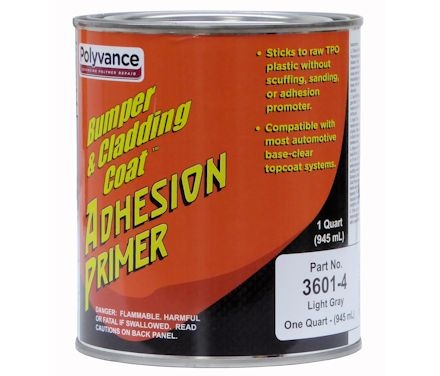
Light Gray Bumper and Cladding Coat Adhesion Primer - Quart
Part No.:3601-4
Weight: 2.30 LB
Volume: 1 quart
Length: 4.25 IN
Height: 4.75 IN
Width: 4.25 IN
UPC: 694687000578
Accepted Payments:
Visa, MC, American Express, Discover, PayPal
IMPORTANT NOTE: Due to hazmat restrictions, we cannot ship this item overseas.
Bumper and Cladding Coat Adhesion Primer is an advanced, solvent-based coating designed to help your automotive base-clear topcoat system stick to unprimed TPO plastic bumpers. Bumper and Cladding Coat Adhesion Primer sticks tenaciously to unsanded, unscuffed raw TPO plastic. Once the Adhesion primer is dry, it can be topcoated with most base-clear systems without sanding or scuffing. (6.3 lb/gal VOC)
Bumper and Cladding Adhesion Primer is designed to permanently stick to the bumpers, side cladding, and trim found on many of today's cars, trucks, and SUV's. As everyone knows, most bumpers are made from plastics that are very difficult to get anything to stick to. Bumper and Cladding Adhesion Primer WILL stick to raw TPO and polypropylene. Once the primer is on, your basecoat-clearcoat will stick.
That’s right… scuffing and sanding is NOT necessary to get adhesion that can stand up to a pressure washer! Check out this video for proof!
Benefits:
- Sticks to smooth or textured TPO plastics. Ideal for easy refinishing of new, unprimed OEM replacement bumpers from Toyota, Nissan, Kia, Subaru, etc.
- No sweat! Quit “sweating” your bumpers in the paint booth. No need to clean, sweat, re-clean, and so on.
- Sticks to TPO plastic without sanding or scuffing. Just clean the bumper with our 1000 Super Prep plastic cleaner and shoot the Bumper & Cladding Adhesion Primer on!
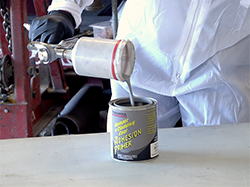
- Simple, ready-to-spray, 1K formulation means there’s no waste. What you don’t use, pour back into the can!
- Compatible with most urethane and polyester-based base-clear topcoat systems. Bumper & Cladding Adhesion Primer does not have to be scuffed or sanded prior to topcoating, and it may be topcoated at any time after application.
- A proven labor-saver since its introduction in 2003.
Notes:
- Original Formula Bumper & Cladding Coat Adhesion Primer is ready to spray, but it may be thinned if needed with lacquer thinner (up to 5% by volume).
- The highest quality control measures are taken during the production of Bumper & Cladding Coat Adhesion Primer. However, it is highly recommended a 25 micron filter be used to filter the paint immediately before use.
- Be sure to check the list of compatible substrates and compatible topcoats.
Application:
- The first step is to identify the bumper to make sure it’s raw polypropylene.
- Then you’ll prep the bumper by cleaning it with one of Polyvance’s approved plastic cleaners.
- Spray the Bumper & Cladding Adhesion Primer on the surface and let it dry completely.
- Finally, apply your color using an approved topcoat system.
Step-by-Step Instructions (Click or tap to expand)
Step 1 - Identify the Bumper
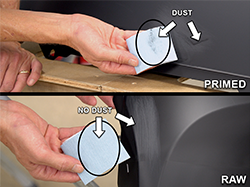
Bumper & Cladding Adhesion Primer is intended for application ONLY to new, unprimed OEM replacement bumpers made of polypropylene and TPO. These normally come from Toyota, Nissan, Kia, Hyundai, and Subaru. Bumper & Cladding is NOT intended for use on primed bumpers. If you are not sure whether the bumper is primed, we recommend sanding an inconspicuous area with 400 grit to see if it dusts up. If so, do NOT use Bumper & Cladding Adhesion Primer; use your paint system’s recommendations for primed parts.
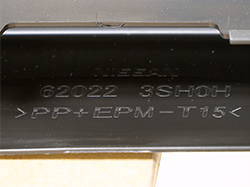
If the bumper is raw, unprimed plastic, then make sure it is made of a polypropylene blend by checking the identification symbols on the backside. They should say PP, TPO, TEO, or TSOP. If you are sure you have a raw, unprimed bumper made of a polypropylene blend, then you can move to the next step.
Step 2 - Clean the Bumper
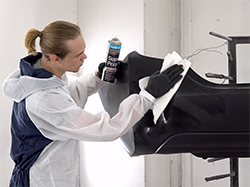
You only need to clean the plastic with 1000 Super Prep or 1001 EcoPrep to remove the mold release from the part. No scuffing or sanding is required. Simply spray the cleaner on an area about one foot square, let it sit for a few seconds to dissolve the surface contamination, then wipe clean with a paper towel, exposing a dry, clean surface with each wipe. This way the contaminants are floated and removed from the surface.
Even though it’s not necessary, some shops insist on scuffing the plastic lightly, which is fine. Just use one of Polyvance’s cleaners FIRST to remove the mold release, then scuff with a fine pad, making sure to get into any tight detail areas. When you’re finished scuffing, clean the bumper again with the plastic cleaner to remove any sanding dust.
Step 3 - Spray the Bumper & Cladding Coat™ Adhesion Primer
First select the product. Polyvance has a “National Rule” line in the Orange label with 6.3 pounds per gallon of VOCs, and a “Low VOC” line in the Gray label with 2.09 pounds per gallon. Each of the product lines is available in white, light gray, and dark gray. These can be intermixed to achieve your desired undertone for best basecoat hide. All Bumper & Cladding products are one K and ready to spray out of the can.
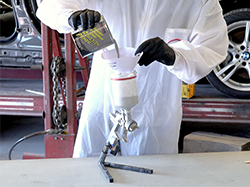
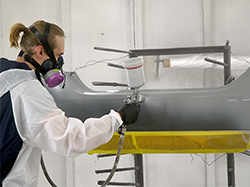
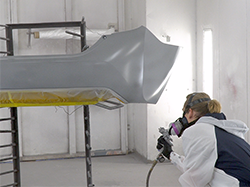
Simply stir the paint and filter into your spray gun. We recommend an HVLP gun with a 1.2 to 1.4 millimeter nozzle size. Apply one medium wet coat of Bumper & Cladding Adhesion Primer to hide. Don’t try to flow the primer out; it will appear slightly rough until it dries. Allow at least five minutes of flash time between coats.
After your first coat, inspect the bumper for any areas of light coverage, then spray only those areas. It’s only necessary to have a single uniform coat of Bumper & Cladding Primer over the surface for it to do its job, the thinner, the better. And pour any leftover primer back into the can… it’s a one K product, so every drop will go onto your bumper, further reducing your costs. Allow the Bumper & Cladding Primer at least 60 minutes to dry at room temperature or 15 minutes at 130 degrees.
The recoat window on Bumper & Cladding Primer does NOT close… in other words, you can spray color over the Bumper & Cladding Primer days, weeks, or even months later. This is another advantage of the Bumper & Cladding Primer… you can spray the primer ahead of time and apply the color with the rest of the vehicle without having to sweat the recoat window.
Step 4 - Apply Your Color
Apply an approved color coat system over the dry Bumper & Cladding Adhesion Primer. No scuffing or sanding of the primer is required – just tack and shoot. Our primer is compatible with most solvent and waterborne paint lines from the major suppliers.
Click here to see the latest list of compatible topcoats.
Informational Video (Click or tap to expand)
High Resolution Image(s) (opens in a new tab/window)
URE3601-4 POL3601-4 bumper and cladding coat, bumber, Light Grey Bumber and Cladding Coat Adhesion Primer clading, bumper adhesion primer URE3601-4 URA3601-4 694687000578 B0007L7B4A sku 3601-4 36014 UR3601-4 POL3601-4 Bumper and cladding primer URT3601-4 URT-3601-4 PLY3601-4 POL 3601-4 US-3601-4 bumper cladding coat PV3601-4 UPC694687000578 URE-3601-4 Bumper & Cladding Coat Adhesion Primer, Lt Gray PLV3601-4 PLV-3601-4

