We help people repair plastic
Bumper Mate 3

$389.95
Part No.:6077
Weight: 21.20 LB
Length: 31.50 IN
Height: 4.25 IN
Width: 29.75 IN
UPC: 694687006648
Accepted Payments:
Visa, MC, American Express, Discover, PayPal
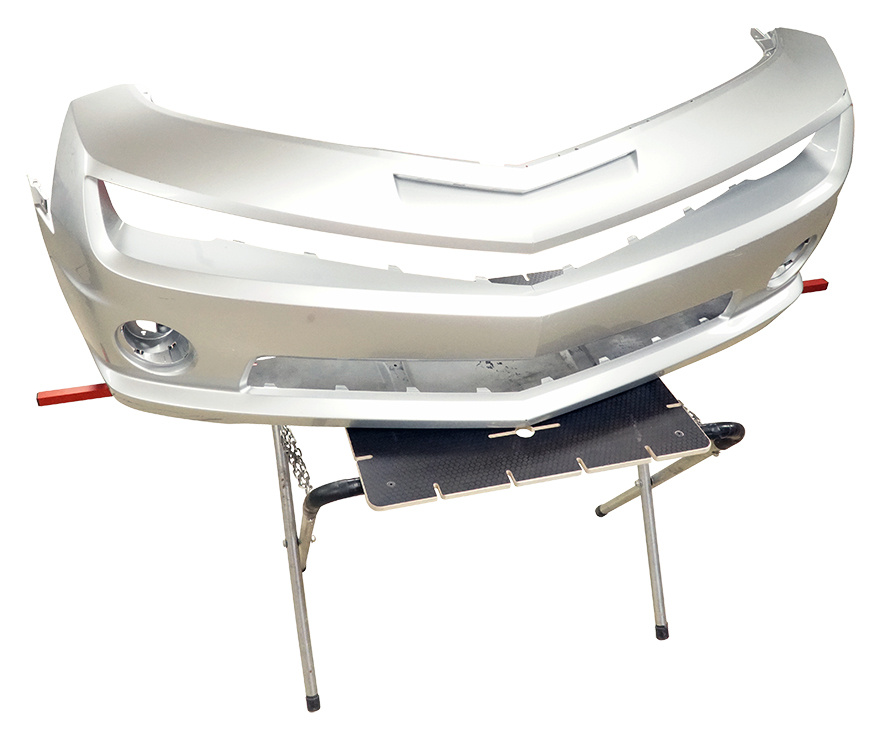
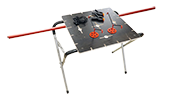
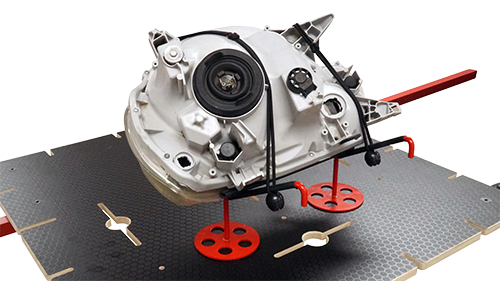
Bumper Mate 3.0 Bumper Workstation
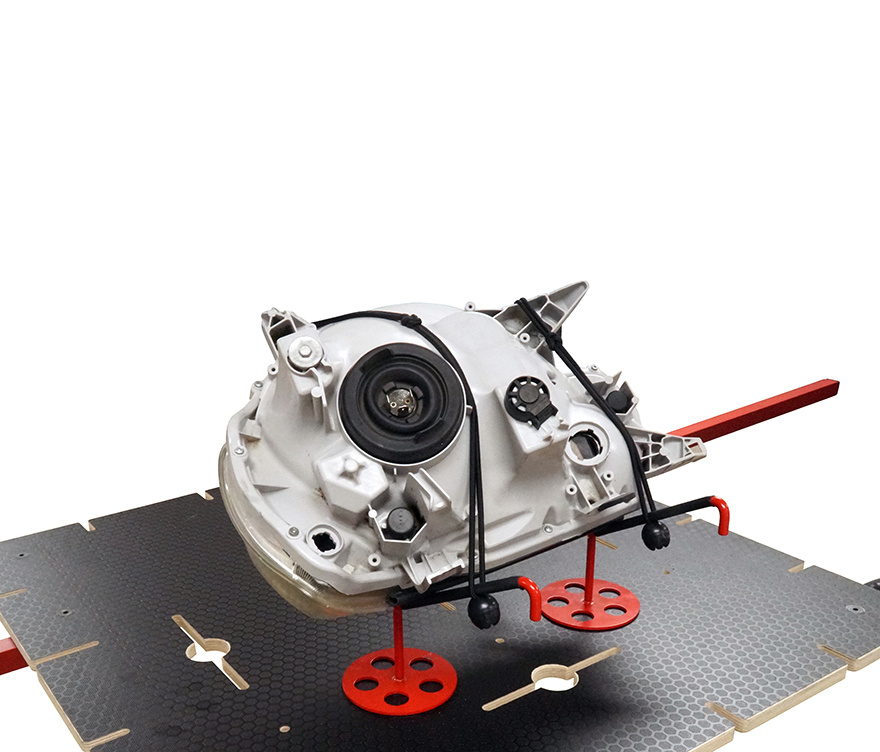
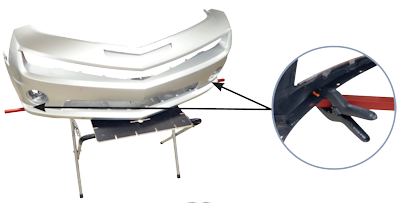
Polyvance’s Bumper Mate 3 plastic repair workstation is a multi-use work surface that allows a repair technician to easily secure plastic bumper covers, headlights, fenders, and other parts in virtually any position for repair.
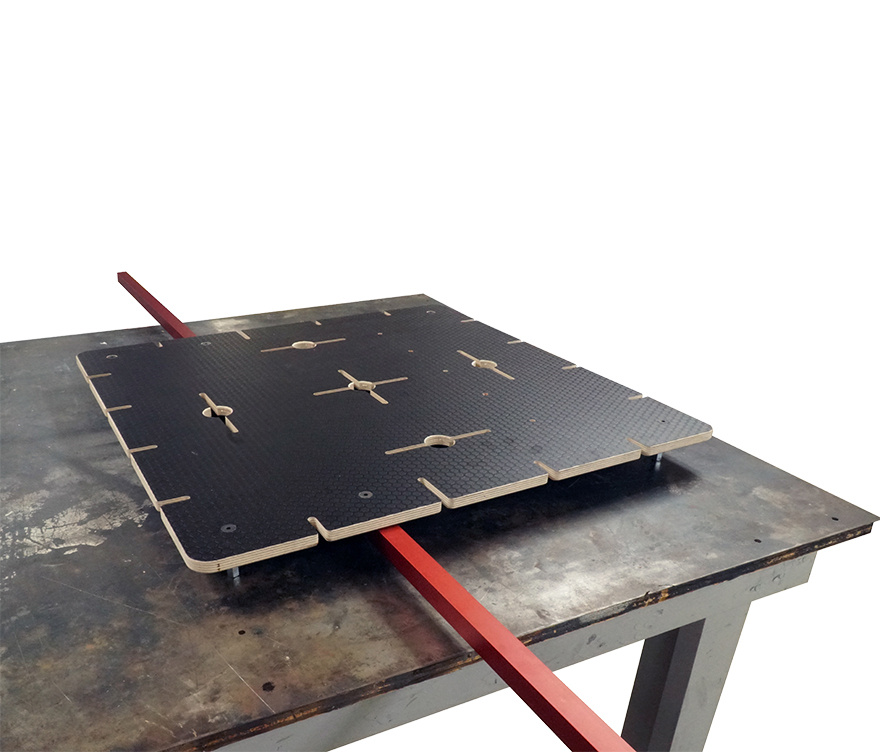
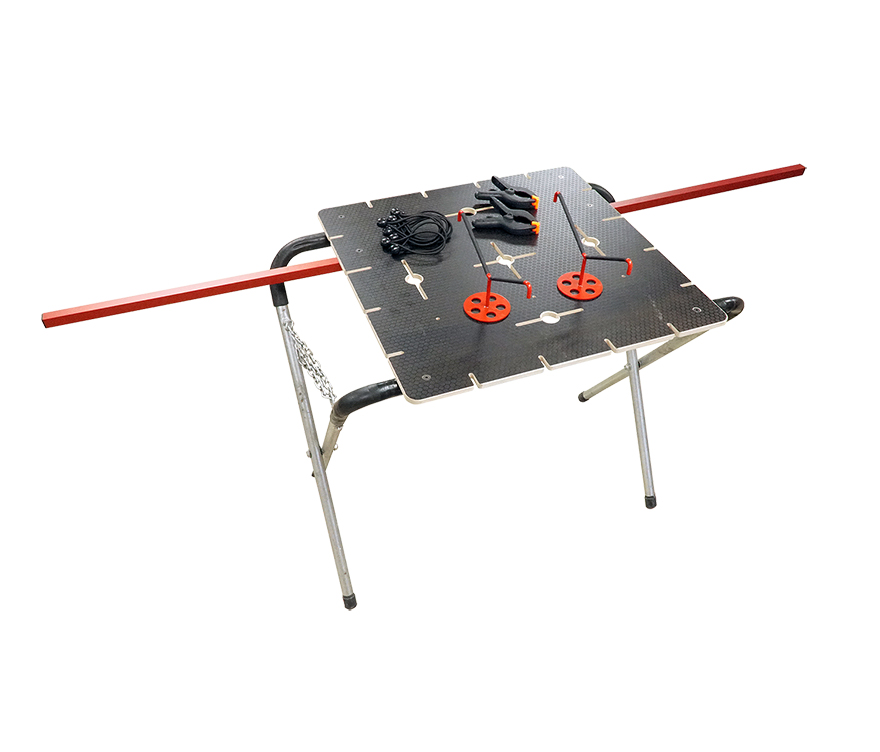
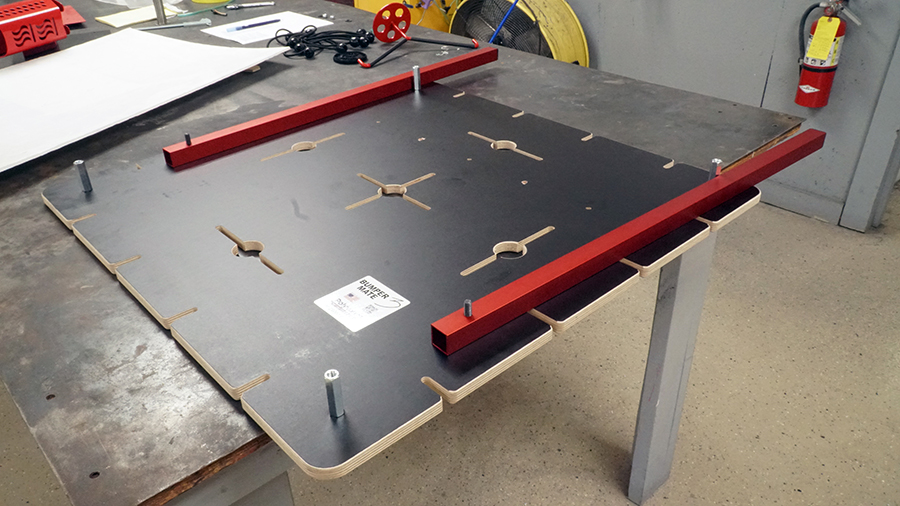
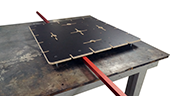
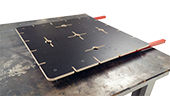
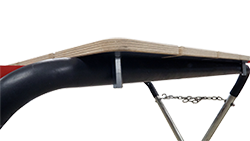
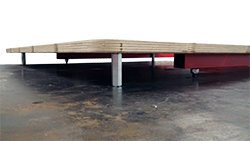
The Bumper Mate 3 includes pivoting support arms, a slotted top for bungee tie-downs, a durable, burn-resistant composite work surface, and two moveable support stands to securely hold awkwardly shaped parts. The work top is normally used on a common scissor stand (not included), but can also be used on top of any larger work surface. The Bumper Mate 3 stores compactly when not in use.
No longer will two people be needed to hold a bumper while a third person does the repair. With the 6077 Bumper Mate 3, one person can easily clamp the bumper in virtually any position, do the prep work, and weld it, making repairs in even the most awkward positions easy!
More than anything else, the Bumper Mate 3 is designed to save time and money by allowing your technicians to be more productive repairing plastic.
Features
- Highly-durable, heat-resistant, textured composite worksurface.
- 11-ply baltic birch core for extreme strength and dimensional stability.
- Strategically placed cut-out slots for securing workpieces to the top.
- Two movable aluminum extension arms for supporting bumper fascia of nearly any size.
- Two cushioned "cradles" to support headlights, washer bottles and other irregularly shaped items.
- Two spring “A” clamps to secure bumpers to the tabletop.
- Lightweight and stores in a small space when not in use.
- "Standoffs" on the bottom of the work surface steady the top on the scissor stand and allow you to use the Bumper Mate on a flat surface with full use of the extension arms.
- Made in USA
Benefits
- Securely holds flimsy bumper fascia so one technician can work on it, maximizing productivity.
- When used in combination with the included bungee cords and cradles, it securely holds odd-shaped parts.
- Extends the function of your shop's folding work stands to support a variety of parts.
Tools Needed for Assembly (not included):
- 1/2 in. combination wrench
- 3/16 in. Allen wrench
Video:
Product Specifications:
- Shipping weight: 21.2 lb. (9.62 kg)
- Shipping dimensions: 31.5 in. L x 29.75 in. W x 4.25 in. H (80 cm x 75.6 cm x 10.8 cm)
- Table Top dimensions: 29 in. L X 29 in. W (74 cm X 74 cm)
- Arms-Expanded dimensions: 81 in. L X 29 in. W (206 cm X 74 cm)
- Made in USA from domestic and imported components
Assembly Instructions (Click or tap to expand)
Step 1
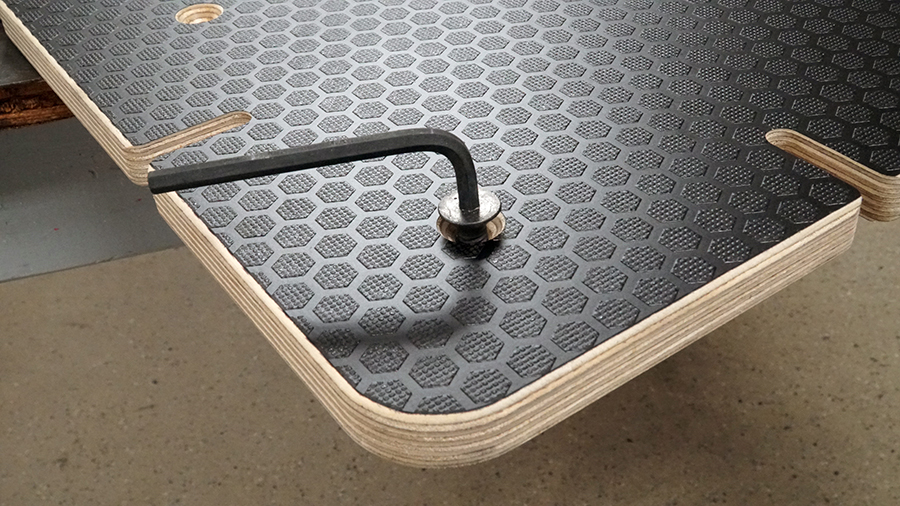
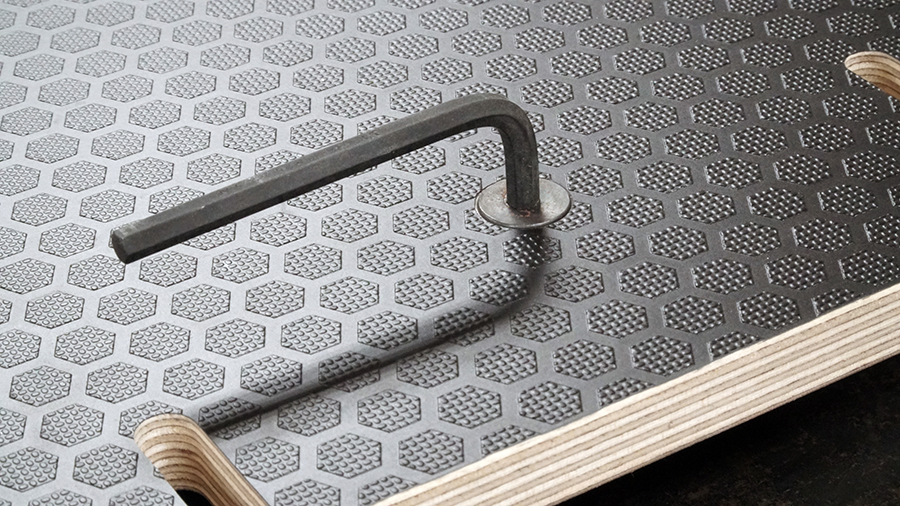
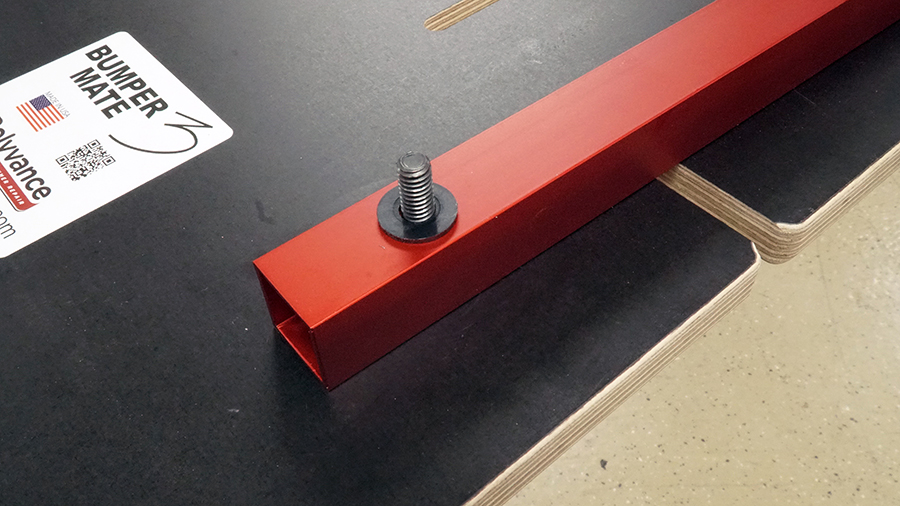
Install one short screw into each of the countersunk holes at each corner of the work surface. (4 total)
Step 2
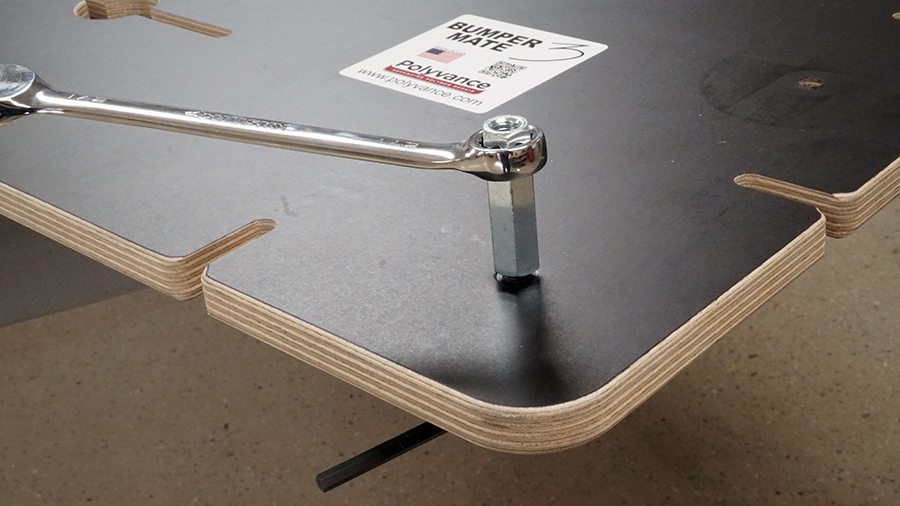
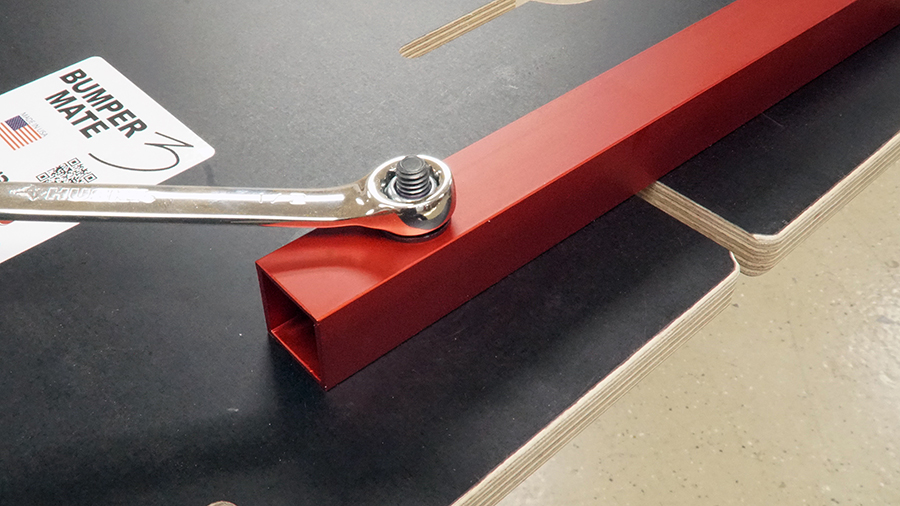
Screw the stand-offs onto each screw and snug with a 1/2" wrench and 3/16" allen head wrench.
Step 3
Install the two longer screws into the remaining countersunk holes.
Step 4
Place the aluminum arms on the screws with the are on the outside of the stand-offs.
Step 5
Place the plastic washer on the screw, sollowed by the lock nut.
Step 6
Snug the locknut so the arm moves freely, but without any slop. DO NOT OVER-TIGHTEN, damage to the bottom surface will result.
Using the Bumper Mate 3 (Click or tap to expand)
Place assembled workstation on a scissor stand that was adjusted to fit inside the standoffs on the bottom of the Bumper Mate 3. Orient the top so the movable arms are on the open sides of the stand. The Bumper Mate 3 can also be used on a tabletop and still have full use of the arms, stands and bungee slots.
Adjust the arm angle to give the best support to the size of bumper or other part being repaired. Using “A” clamps, clamp the lip of the bumper cover to the arms.
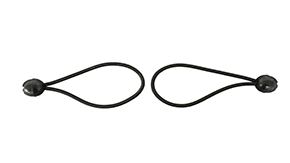
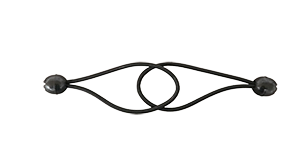
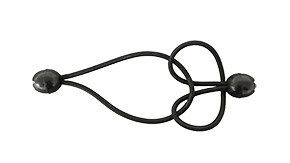
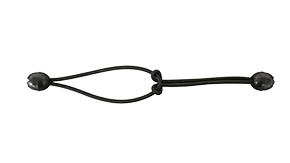
If additional support is needed to secure a bumper cover or other object to the work surface, ball bungees can used to help stabilize the part. Link as many bungees as needed to go from one slot to another. If you have 5 bungees linked and you only need 4 for the right length, there is no need to unlink the extra bungee, just pull the bungee to the next ball and place it in a slot.
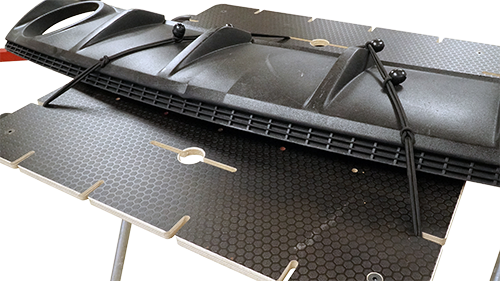
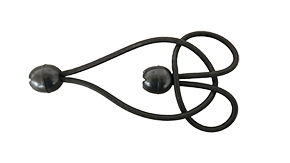
To use the cradles, estimate the distance between the cradles needed to support the part. Twist and push the mounting cradle stems into one of the five holes in the top. They are snug and will require some effort. Turn the cradles as needed to support the part, then place a bungee over the part and hook each end into the down-turned ends of the cradle.
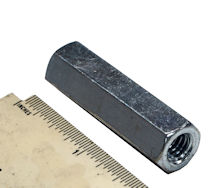
Product Contents / Parts List (Click or tap to expand)
| Image | Qty | Part No. and Description | More Info |
|---|---|---|---|
 |
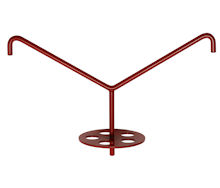
1 | 6077-01 Bumper Mate 3 Table Top |
 |
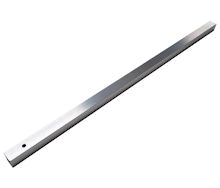 |
2 | 6075-02 Aluminum extension arms (may be red or silver) |
|
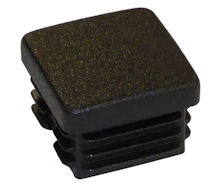 |
2 | 6075-03 End cap |
|
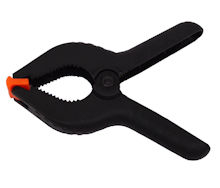 |
2 | 6075-10 A-clamp |
|
 |
2 | 6077-02 Headlight cradle |
|
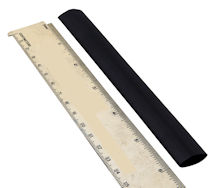 |
4 | 6077-03 Heat Shrink tube for Headlight cradle |
|
 |
4 | 6077-04 Stand-off |
|
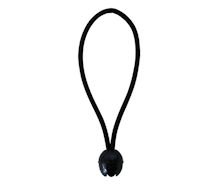 |
10 | 6077-05 Ball-end bungee |
|
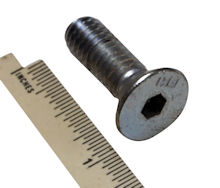 |
4 | SCREW6 1-inch Screw |
|
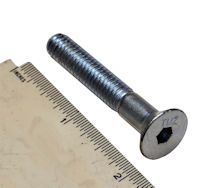 |
2 | SCREW7 2-inch Screw |
|
High Resolution Image(s) (opens in a new tab/window)
This page was created on January 07, 2022
headlamp repairs URE6077 POL6077 URA6077 694687006648 sku 6077 UR6077 POL6077 URT6077 URT-6077 PLY6077 POL 6077 US-6077 PV6077 UPC694687006648 URE-6077 Bumper Mate 3 PLV6077 PLV-6077