We help people repair plastic
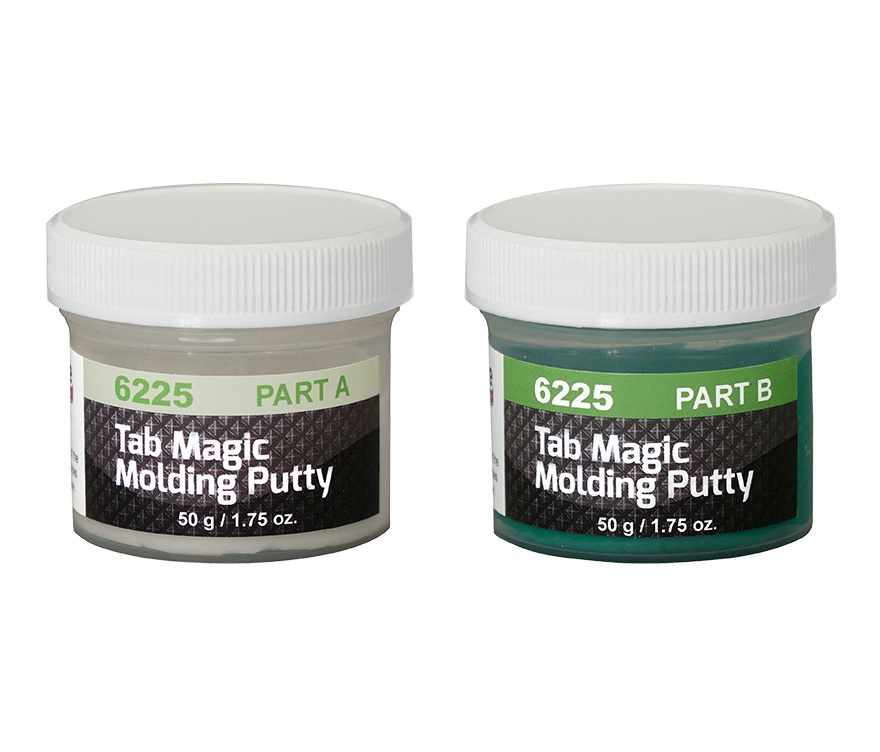
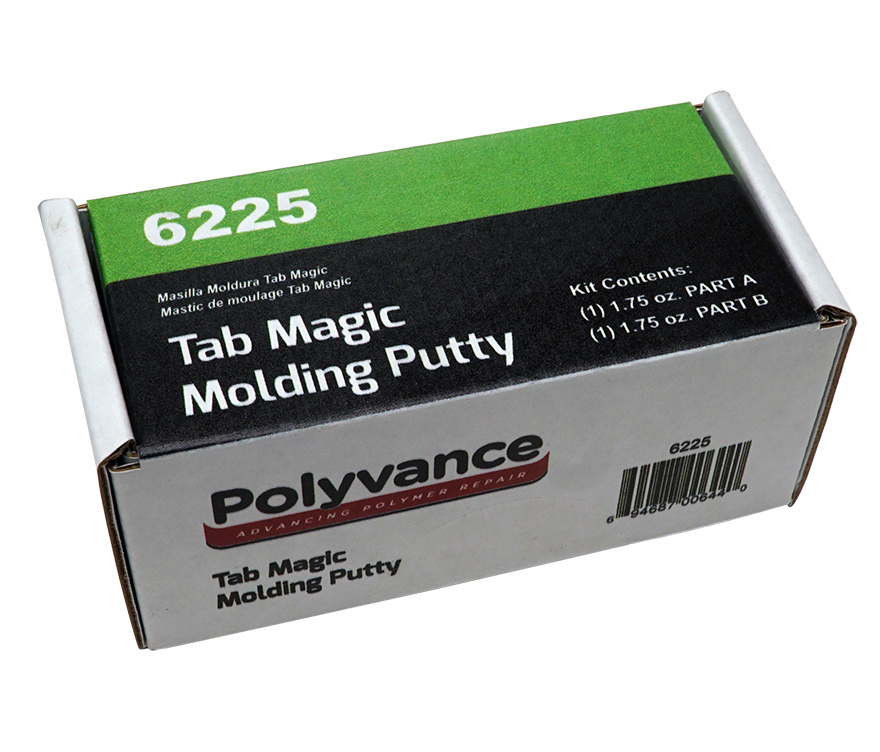
Tab Magic Molding Putty


$31.95
Part No.:6225
Weight: 0.35 LB
Length: 5.25 IN
Height: 2.38 IN
Width: 2.25 IN
UPC: 694687006440
Accepted Payments:
Visa, MC, American Express, Discover, PayPal
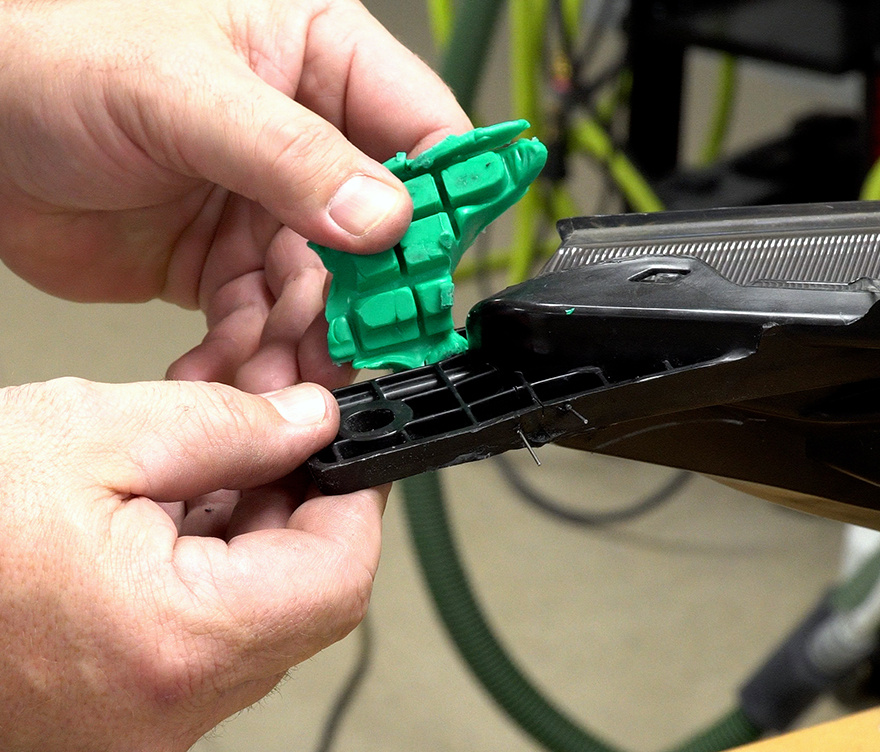
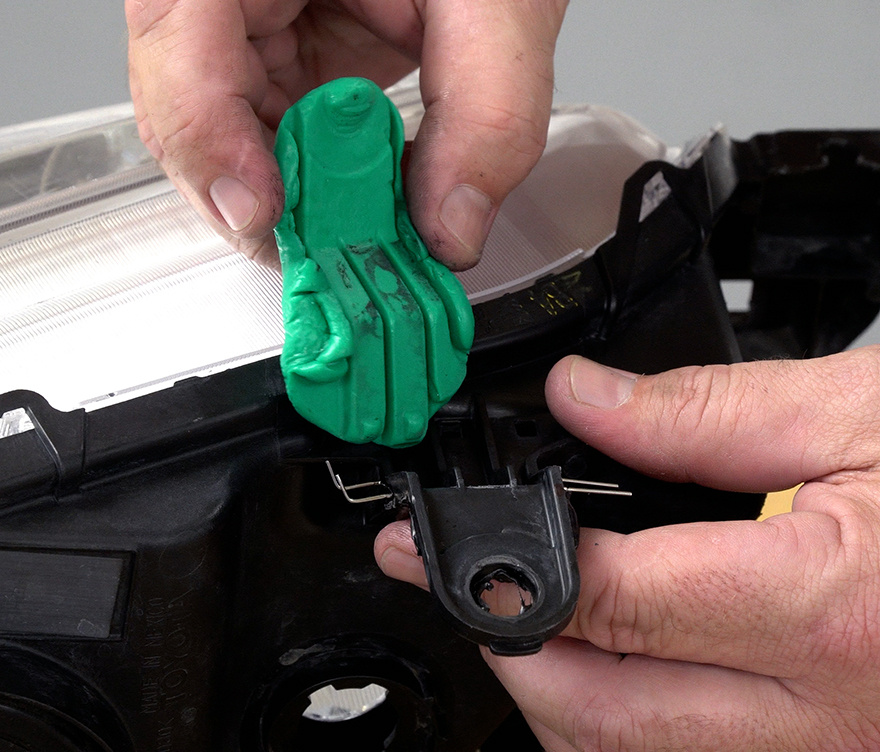
Tab Magic Molding Putty is a two-part moldable, flexible silicone rubber which is non-toxic and temperature resistant. Mix equal parts until a uniform green color is achieved, then quickly press onto the headlight tab where it needs to be welded. The rubber will cure in about 15 minutes and tightly support the fine details on the top of the headlight tab while you weld the backside with your Polyvance nitrogen plastic welder. When finished, peel off the flexible Tab Magic putty to reveal a nearly-finished tab that should just need minor work to finish. Although Tab Magic Molding Putty is not remoldable, it is reusable on the same type of headlight tab.
Many headlight tabs have complex features that are very difficult to restore. If the headlight tab is visible to the vehicle owner, it must be repaired and refinished to the original appearance. 6225 Tab Magic Molding Putty from Polyvance helps ease the refinish of these complex tabs by preventing the backside weld from blowing through and creating imperfections that would be difficult to refinish.
6225 Tab Magic Molding Putty is a two-part moldable, flexible silicone rubber which is non-toxic and temperature resistant. Mix equal parts until a uniform green color is achieved, then quickly press onto the headlight tab.
Features
- Non-toxic silicone two-part putty is easily mixed and molded in just a couple of minutes
- Cures and becomes fully supportive in about 20 minutes, but remains very flexible for easy removal
- Silicone thermoset formulation is highly temperature resistant once set
Benefits
- Retains the fine details found on many headlight tabs while the backside is being welded
- Minimizes the refinish work required on the topside of the headlight tab to restore OEM appearance
- Can make the difference between being able to repair an expensive headlight and throwing the headlight away
Video
Instructional Video (Click or tap to expand)
Instructions
Instructions (Click or tap to expand)

Step 1
Pull out roughly equal amounts of the Part A and Part B putty from their jars.

Step 2
On a clean surface, make equal-sized "pancakes" of both parts. If one is too big, nip off the excess and put it back in the jar for use later on.

Step 3
Put the pancakes on top of one another in preparation for mixing.

Step 4
Mix the two sides by pressing and kneading them together by hand. You only have about two minutes to mix before the rubber starts to harden, so mix quickly but thoroughly.

Step 5
Knead and mix the two sides until a uniform green color is achieved with no streaks of white.

Step 6
Apply the mixed putty to the headlight tab in the area you want to repair. Press the putty firmly into the cavities and details of the tab.
High Resolution Image(s) (opens in a new tab/window)
This page was created on October 27, 2020
URE6225 POL6225 URA6225 694687006440 B08M11VKZM sku 6225 UR6225 POL6225 polyvance tab magic moulding putty URT6225 URT-6225 PLY6225 POL 6225 US-6225 PV6225 UPC694687006440 URE-6225 PLV6225 PLV-6225
Products related to Tab Magic Molding Putty :
reviews 0
6204