We help people repair plastic
Kenworth W900 Long Hood Spring Pocket Repair Kit
Part No.:KENW900LSP
Weight: 9.25 LB
Length: 16.00 IN
Height: 8.00 IN
Width: 10.00 IN
UPC: 694687006822
Accepted Payments:
Visa, MC, American Express, Discover, PayPal
Kenworth W900 Long Hood Spring Pocket Repair Kit
If you have other heavy truck repair applications not covered by our kits, email info@polyvance.com with information.
IMPORTANT NOTE: Due to hazmat restrictions, we cannot ship this item overseas.
The damage to Kenworth W900 Metton hood spring pockets is very common. An OEM Kenworth W900 hood will set you back at least $5,000. Even an aftermarket fiberglass Kenworth W900 hood costs about $2,500. Polyvance has a much more economical solution to repair the damaged Kenworth W900 spring pockets. Polyvance's "Kenworth W900 Long Hood Spring Pocket Repair Kit" will allow you to repair the broken-out spring pockets on your Kenworth W900 for a fraction of the cost of replacing your damaged Kenworth W900 hood.

Benefits:
- Save thousands over the cost of a new hood.
- Repairing the hood is faster than replacing the hood.
- With the Kenworth long-hood, spring-pocket repair kit, there is no need to paint the hood. Replacing the hood requires you to paint the hood to match.
- Stronger than the original spring pockets. Load is spread out over a much larger area.
- Usually faster delivery times. Definitely cheaper shipping cost.
- Better design. If you replace the hood, you are putting on a new hood with the same poorly-designed spring pockets that will probably break again. The Kenworth long-hood spring pocket repair kit is a better design as it converts the point load to a large-area load.
- This kit will get your truck back on the road quickly so you can continue making money. Every day that your truck is not on the road, you are losing money. Stop losing money. Repair your hood this morning and continue making money this afternoon.
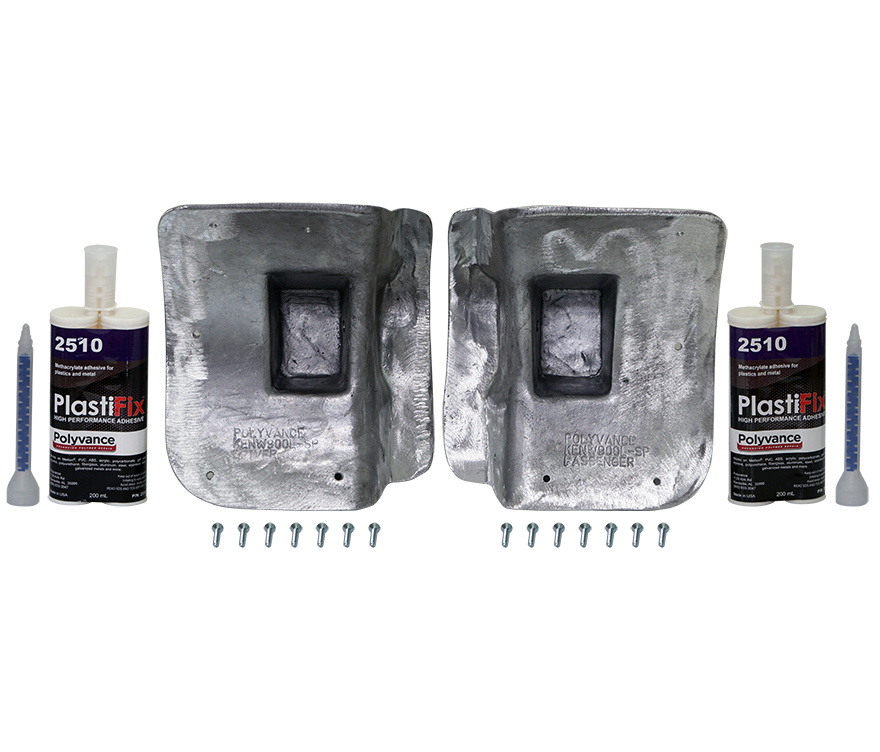
Kenworth W900 Long Hood Repair Kit Contents
- 1 driver side aluminum spring pocket casting
- 1 passenger side aluminum spring pocket casting
- 2 cartridges of 2510 PlastiFix High Performance Adhesive
- 2 mixer tips for the 2510 PlastiFix adhesive
- 14 screws
Tools and Supplies Required (Not Included with the Kit):
- Permanent marker
- Dust mask and gloves
- Small reciprocating saw with a wood style blade.
- 50 grit Roloc® disc and Roloc® sander
- 60 grit or coarser sandpaper
- Drill with a 1/8" drill bit
- Low strength thread locker
- Body spreader or plastic putty knife
- #2 Phillips head screwdriver
Installation Video (click or tap to expand)
Step-By-Step Instructions (Click or tap to expand)
Step 1
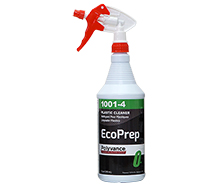
Using 1001-4 EcoPrep™ plastic cleaner, clean the spring hood pocket and the surrounding area where the reinforcing plate will be attached.
Step 2
Using the trim saw, cut away the edge of the hood spring pocket to allow the casting center to clear the hood.
Leave as much material as possible to keep the maximum bond area between the hood and the casting.
Step 3
Test fit the casting to the pocket and trace around the perimeter with a permanent marker. Cut away as much of the flange as needed to make the reinforcement fit all the way down into the pocket.
Step 4
Grind the area where the casting will be bonded with a 50 grit or coarser Roloc™ disc. Be sure all paint is removed inside the traced outline.
Step 5
THOROUGHLY HAND SAND the inside of the pockets anywhere the Roloc™ disc couldn’t reach with 60 grit or coarser sandpaper, make sure all paint is removed and the area is thoroughly roughened. Roughen all remaining surfaces to be bonded with 60 grit or coarser sandpaper.
Step 6
Clean the outside of the aluminum castings with 1001-4 Eco-Prep™ plastic cleaner or 1000-A Super Prep™ plastic cleaner.
Step 7
Thoroughly grind the bonding surface with a 50 grit Roloc™ disc to make it receptive to 2510 PlastiFix© adhesive.
Step 8
Test fit the casting and push it firmly into place. It should be in contact with the hood everywhere, however short gaps up to approximately 1/8” are acceptable but will need to be completely filled with PlastiFix© adhesive. If it doesn’t sit all the way down into the pocket, sand or grind the interfering areas of the hood or casting and test fit again. Repeat this until you’re confident the casting is bottomed out in the pocket.
Step 9
Using a permanent marker or a drill, mark the hole locations for the screws. (Marking with a drill shown.)
Step 10
Drill all seven (7) hole locations and remove the dust using compressed air or a cloth dampened with EcoPrep™ or Super Prep™ plastic cleaner. Make sure the area is completely dry before proceeding.
Step 11
Apply a generous layer of 2510 PlastiFix© evenly over the mating surface of the hood.
Spread the adhesive with a body spreader and work it into the sanding scratches. Work quickly because the adhesive working time is 15 minutes at 68°F (20°C).
Step 12
Immediately apply a generous layer of 2510 PlastiFix© over the mating surface of the casting. Apply the adhesive in rows to allow air to escape when pressing the parts together. There should be enough adhesive applied to the casting to cause some of it to squeeze out when the casting is screwed into place.
Step 13
Install the casting and secure it into position loosely with the included screws. DO NOT TIGHTEN the screws until all screws are in place and the casting is seated into the pocket correctly. Hand tighten the screws only until firmly snug. If the screws are installed too tightly, too much adhesive will squeeze out, starving the joint and weakening the bond.
Step 14
Fill any gaps with more PlastiFix©.
Step 15
Wipe up any excess adhesive.
Step 16
When fully cured, install the OEM eyebolts into the casting with low or medium strength threadlocker to prevent galvanic corrosion between the eyebolt and the casting.
Use a nut and lockwasher on the inside of the pocket to lock the eyebolt into position.
Step 17
Connect the springs only after the PlastiFix© has fully cured. Maximum strength is achieved in 24 hours at 68°F (20°C). PlastiFix® full-cure can be accelerated with GENTLE heat AFTER the initial cure. The adhesive should feel very hard before applying gentle heat. DO NOT EXCEED 130°F (54°C) surface temperature while accelerating the cure; higher temps may reduce the strength of the adhesive.
Step 18
Connect the springs to the eyebolt.
High Resolution Image(s) (opens in a new tab/window)
This page was created on January 17, 2023
UREKENW900LSP POLKENW900LSP URAKENW900LSP URKENW900LSP PLYKENW900LSP SKU KENW900LSP URT-KENW900LSP URTKENW900LSP KENW900LSP US-KENW900LSP URE.KENW900LSP URE-KENW900LSP URSKENW900LSP 694687006822 *ASIN* UPC694687006822 UPC#694687006822 UPC 694687006822 L29-11130100002SPL KW W9 hood assembly w/o hw PLVKENW900LSP PLV-KENW900LSP kentworth hood spring hood springs KEN900LSP


