We help people repair plastic
Peterbilt 579 Hood Repair Kit for Strut Mounts
$729.95
Part No.:PB579ST
Weight: 8.70 LB
Length: 17.00 IN
Height: 11.00 IN
Width: 6.00 IN
UPC: 694687007072
Accepted Payments:
![]()
![]()
![]()
![]()
![]()
Peterbilt 579 Hood Repair Kit for Strut Mounts
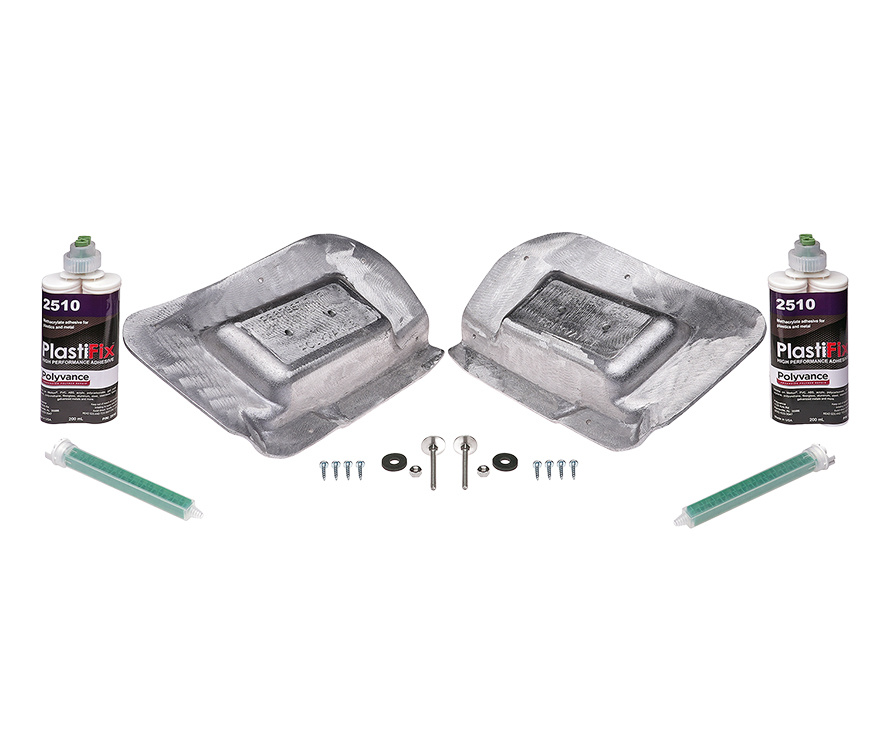
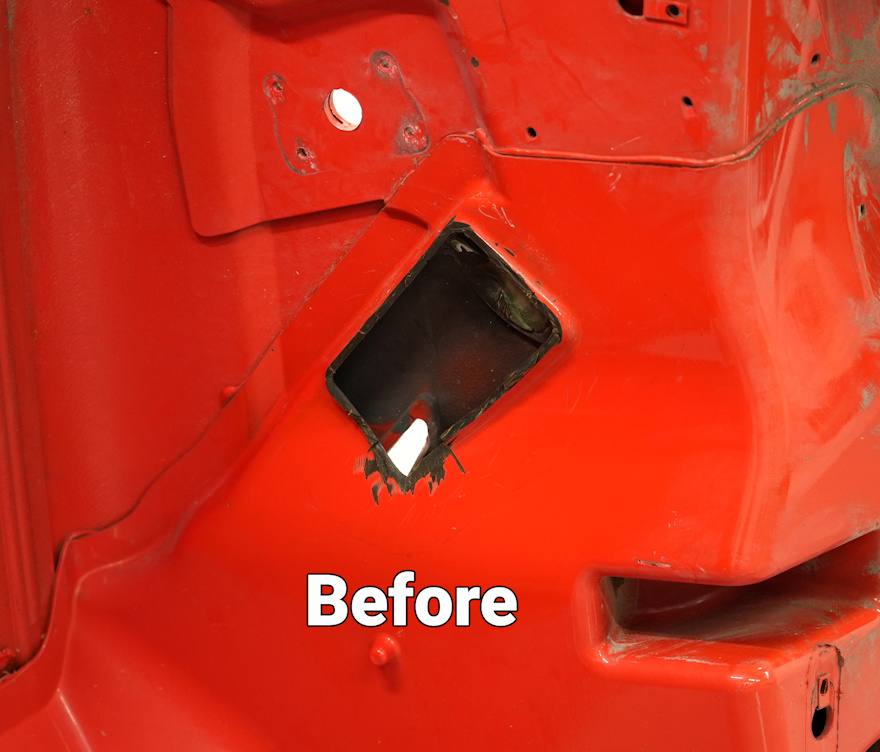
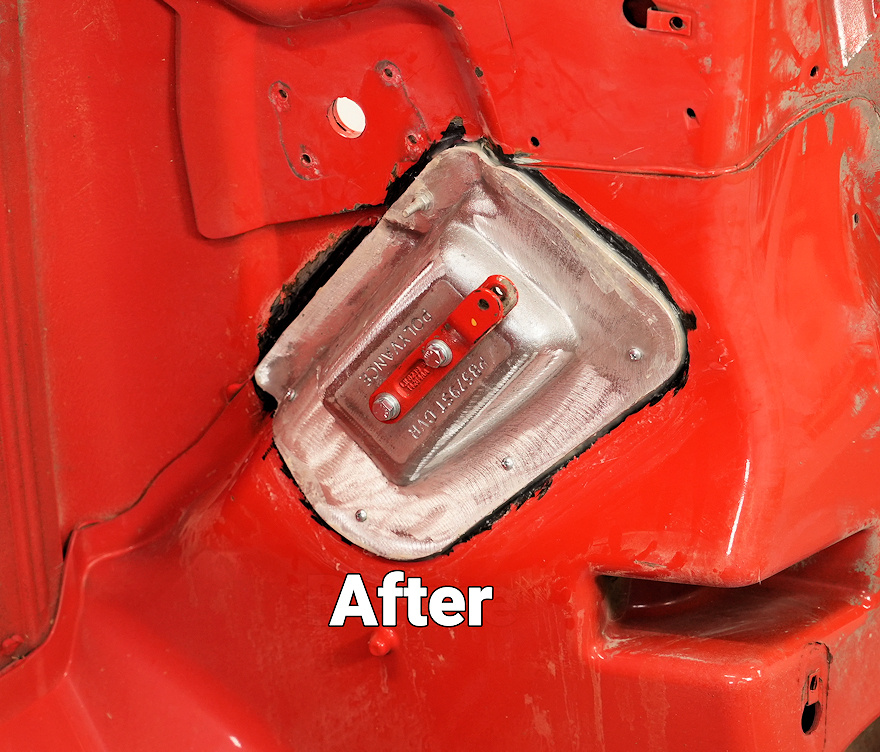
 Polyvance's Peterbilt 579 hood repair kit allows the user to repair the broken hood strut mounts on Peterbilt 579 hoods. These hood Strut Mounts seem to break easily. Rather than spending thousands on a new hood, Polyvance created the Peterbilt 579 Hood Repair Kit which repairs and reinforces the broken hood strut mounts. The cast aluminum strut mounts are screwed and bonded into place with the included PlastiFix high-performance methacrylate adhesive. Repairs passenger and driver side with one kit.
Benefits
- Save thousands over the cost of a new hood.
- Repairing the hood is faster than replacing the hood.
- With the Peterbilt hood repair kit, there is no need to paint the hood. Replacing the hood requires you to paint the hood to match.
- Stronger than the original hood strut mounts. Load is spread out over a much larger area.
- Usually faster delivery times. Definitely cheaper shipping cost.
- Better design. If you replace the hood, you are putting on a new hood with the same poorly-designed strut mounts that will probably break again. The Peterbilt hood repair kit is a better design as it converts the point load to a large-area load.
- This kit will get your truck back on the road quickly so you can continue making money. Every day that your truck is not on the road, you are losing money. Stop losing money. Repair your hood this today and continue making money tomorrow.
Included Contents (Click or tap to expand)
- (2) Aluminum castings ((1) Driver side AND (1) passenger side)
- (2) Cartridge kits of PlastiFix High-Performance Adhesive
- (2) Mixing Tips
- (8) Screws
- (2) Stainless steel elevator bolts with stainless steel nuts
Required Tools and Supplies (not included with kit) (Click or tap to expand)
-
-
- 24 to 50 grit Roloc® discs
- 90 degree air grinder for Roloc® discs
- #2 Phillips head screwdriver
- Drill and 5/32", 1/4", 3/8" drill bits
- 60 grit or coarser sandpaper
- Medium strength (blue) thread locker
- Permanent marker
- Respirator and nitrile gloves


Instructions (Click or tap to expand)

Step 1
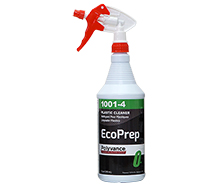
Clean the aluminum casting to remove any production oil residue using 1001-4 EcoPrep plastic cleaner.

Step 2
Clean the damaged area of the hood with 1001-4 EcoPrep plastic cleaner. Dry completely.

Step 3
Test fit the casting. Grind or sand the interference areas of the hood or casting with a Roloc™ disc or a die grinder. Trace the outline of the casting onto the hood.

Step 4
Sand away all paint and oxidized plastic within the traced area. Hand sand any areas not reached with the Roloc disc. Its very important to expose fresh, clean plastic.

Step 5
Grind the mating surface of the casting with a coarse Roloc™ disc.

Step 6
Hand sand the mating surface of casting missed by the Roloc™ disc, using 60 grit or coarser sandpaper.

Step 7
Blow dust off the sanded hood and casting. Do not re-clean with 1001-4 EcoPrep as moisture may become trapped in the sanding grooves and interfere with the bond.

Step 8
Place casting in place and mark the hole locations.

Step 9
Drill the marked holes with a 5/32” drill bit. Drill through to the outside of the hood only in the location shown above.

Step 10
Apply blue thread locker to the bolts and fasten the forked bracket to the casting.

Step 11
Loosely screw the casting to the hood. Using gentle pressure and high speed to reduce tear-out, drill a 1/4” hole through the hood at the location shown.

Step 12
Counter-bore the 1/4” hole, 1/4” deep with a 3/8” drill bit to provide clearance for the bolt’s shoulder.

Step 13
Tap the elevator bolt with rubber washer into the hole.

Step 14
Using a two inch wide piece of tape, tape the bolt in place.

Step 15
Remove the casting then apply half a cartridge of 2510 PlastiFix adhesive to the hood.

Step 16
Apply the other half of the 2510 PlastiFix adhesive to the mating surface of the casting.

Step 17
Install the casting onto the hood using the screws, elevator bolt, and nut. Apply just enough torque to snug the casting in place.

Step 18
Wipe excess adhesive from the hood.

Step 19
Remove the tape and wipe away any adhesive that may have squeezed through.

Step 20
Allow 24 hours for full cure before attaching the strut and returning the hood to service.
How-to-install Video (Click or tap to expand)
High Resolution Image(s) (opens in a new tab/window)
This page was created on April 15, 2025
RELATED PAGES
Products related to Peterbilt 579 Hood Repair Kit for Strut Mounts :
reviews 0
6118
reviews 0
1001-4
reviews 0
2510