800 633 3047
  • English version of websiteUS / English
    • Portuguese version of websiteBrasil / Português
    • Spanish version of websiteMexico / Español
register or Login
Register
Forgot password
Home All Products New Products My Account Blog
View cart 0 items
Polyvance logo

View cart

0 items

We help people repair plastic

  • Home
  • All Products
  • New Products
  • My Account
  • Blog

Home Repairing Plastics with 2 part epoxy
Information
Auto & Truck Part Repair
Broken Grille Repair
Dashboard Restoration
Fan Shroud Repair
Padded Dashboard Repair
Plastic Radiator Repair
Radiator Overflow Tank Repair
Steering Wheel Restoration
Textured Plastic Bumper Repair
Aircraft Repair
Airplane Canopy Repair
Instrument Panel Repair
Bumper Repair
Bumper Grille Bar Repair
Bumper Repair Flow Chart
Camry Bumper Repair
Ford F150 Textured Plastic
Flange Repair With Nitrogen Welder
Hinged Tab Replacement
Infiniti FX45 Bumper Repair
Mercedes ML320 Bumper Repair
Recreate Missing Bumper Piece
Repair and Retexture Bumper
Tab Repair With Nitrogen Welder
Dirt Bike and ATV Repair
How to Repair ATV Plastic
How to Paint ATV Plastic
Farm Equipment Repair
John Deere Lawn Tractor
Poly Pipe Repair
Spray Tank Repair
Stock Tank Repair
Water Tank Repair
Kayak and Canoe Repair
Large Truck Repair
Kenworth Hood Repair
Playground Equipment
Playground Slide Repair
Street Bike Repair
Repair Broken Fairing
Replace Missing Tab
Create Missing Piece
Watercraft Repair
Sea-Doo Polytec Hull
SMC Hull Repair
Documents
Bumper ID Table
Catalog
Product Info
Product Images
Safety Data Sheets (SDS)
"The Book" of Plastic Repair
How To...
Identify Plastics
Refinish Plastics
Repair Plastics
Nitrogen Welding Information
Polyvance University
Standard Operating Procedures
3804 Flextex VT SOP
Polypropylene Repair SOP
Metton (DCPD) Panel Repair SOP
Slot Tab Repair SOP
Padded Dashboard Repair SOP
Nitrogen Plastic Welding SOP
Airless Welding SOP 1
Airless Welding SOP 2
Kayak Repair SOP
Testimonials
Training
Bumper Recyclers
What is bumper recycling?
Bumper Identification
Welding Rod List
Video
Agricultural Repair
Airless Fusion Welding
Bumper Cover Repair
Dashboard Repair
Equipment Maintenance
FiberFlex Repair
Heavy Truck Repair
Kayak Repair
Miscellaneous Repairs
Nitrogen/Hot Air Fusion Welding
Paint/Texture
Plastic Identification and Information
Plastic Pointers - Quick Tips
PlastiFix
Products and Tools
Radiator Repair
Thermoset Polyurethane (PUR) Repair
Products
Best Sellers
CLOSEOUT SPECIALS
Adhesion Promoter
Filler Prep
Plastic Magic
Aluminum Tape
Bumper & Cladding
Adhesion Primer - Original Formula
Adhesion Primer - Low VOC
Color Coat
Cleaners
EcoPrep
Super Prep
Everything Else
Fiberglass Cloth
Tab Magic
Fillers
Cream Hardener
Flex Filler
Hardset Filler
Padded Dash Filler
Heavy Truck Hood Repair Kits
Insta-Weld
Plastic Sheets
Polyethylene Sheets
Polypropylene Sheets
Plastic Stapler
Hot Stapler
Staples
Plastic Welders
Most Popular Plastic Welders
Airless Welders
ATV Fender Welders
Hot Air Welders
Kayak and Canoe Welders
Nitrogen Welders
Nitrogen Welder Accessories
Plastic Radiator Welder
Plastic Welding Rods
Assortments
ABS
Acrylic/PVC
ASA
FiberFlex
GTX (PA+PPE)
HDPE + GF15
Nylon (PA)
PBT
PC+ABS
PET
POM
Polycarbonate (PC)
Polyethylene (HDPE)
Polyethylene (LDPE)
Polypropylene (PP)
Polyurethane
PP + GF15
PPE+PS
PPX (PPE+PP+GF30)
PVC
TPO
PlastiFix
PlastiFix Kits
PlastiFix Refills
Primer
Waterborne Primer
Primer Catalyst
Reinforcing Mesh
Sealer
Texture Spray
Flex Tex
Tools
Applicator Guns
Body Bags
Dent Drivers
Die Grinder Bits
Pliers
Rod Organizer Cases
Rollers
Sensor Hole Cutters
Tab Tools
Whip Hose
Workstation
Training
Parts
Welder Parts
Airless Welder Parts
Hot Air Welder Parts
New Products
Discontinued Products

Repairing Plastics with Two-Part Adhesives

Clean both sides of the plastic in the damaged area with 1000 Super Prep or 1001-4 EcoClean plastic cleaner. Fixture the front side with clamps or aluminum tape to hold the part together while the adhesive on the backside cures.

Sand backside

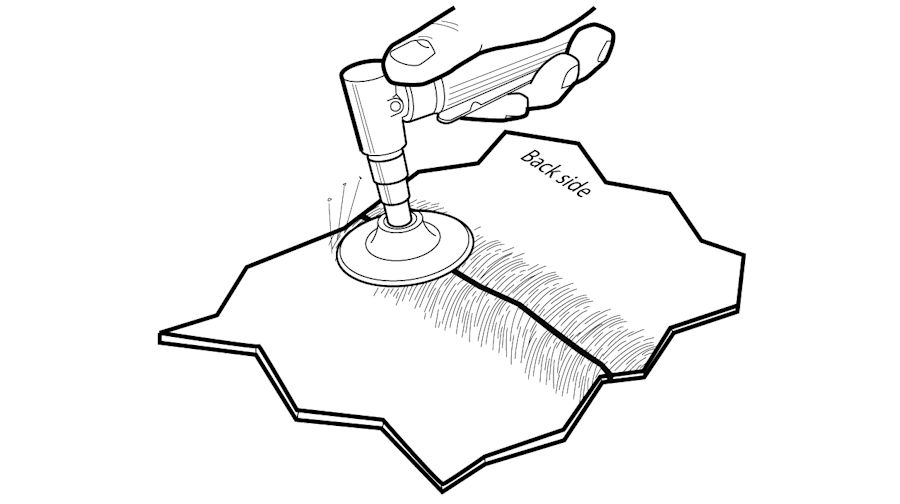
Sand the backside of the area to be repaired with 50 grit sand paper or coarser. A v-groove is not required unless you need to sand the backside flat for cosmetic reasons. Remove paint in the surrounding area with 80 grit in a DA. Heavy grooving of the plastic is desirable to maximize the mechanical strength of the bond. Blow dust free with clean, dry compressed air.

If the material is TEO, TPO or PP, apply 1060FP Filler Prep or 1050 Plastic Magic Adhesion Promoter. Brush or spray onto the sanded area and allow to flash off.

Choose a two-part adhesive system to match the hardness of the substrate according to the following table:

Adhesive Substrate
2000 Flex Filler flexible substrates, polyurethane, soft TPO
2020 SMC Hardset Filler rigid substrates, semi-rigid TPO, SMC, fiberglass
2510 PlastiFix two-part rigid substrates, Metton®, SMC, fiberglass, metals

Select a reinforcing method for the backside of the part. For flat areas, it is often easiest to cut a backing plate out of scrap material. For contoured areas, use fiberglass cloth or drywall tape.

Prepare reinforcement by cutting 1 to 3 pieces of glass cloth to cover the damaged area about 2”-4” wide. If using a backing plate, make sure it extends at least 2” beyond damage in all directions. Rough grind the side of the backing plate that will be applied to the surface.

Apply adhesive

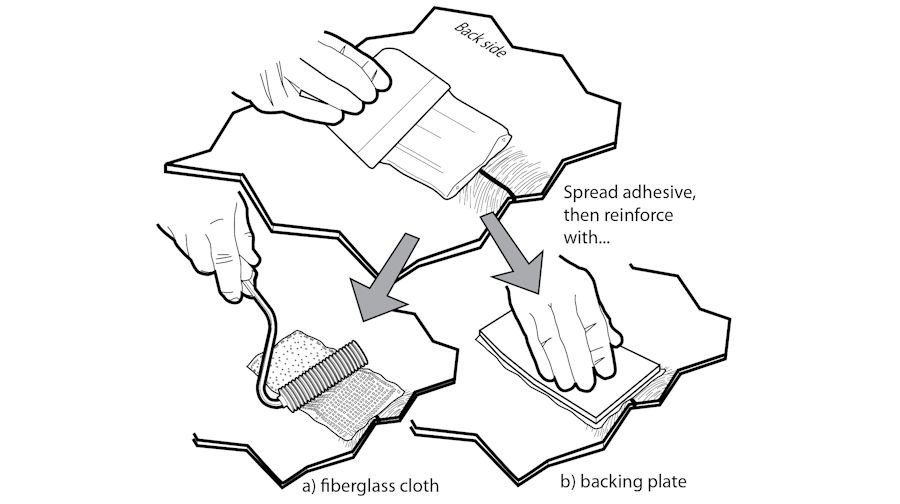
Mix the two-part adhesive according to package directions. Spread a generous amount on the backside with a body spreader. If using a backing plate, press the plate firmly into the adhesive, allowing a small amount of adhesive to squeeze out from the edges. If using fiberglass cloth, lay the cloth into the adhesive and wet the fibers using a 2042-R saturation roller. Apply more adhesive over the area and embed another layer of fiberglass cloth if desired.

V-groove

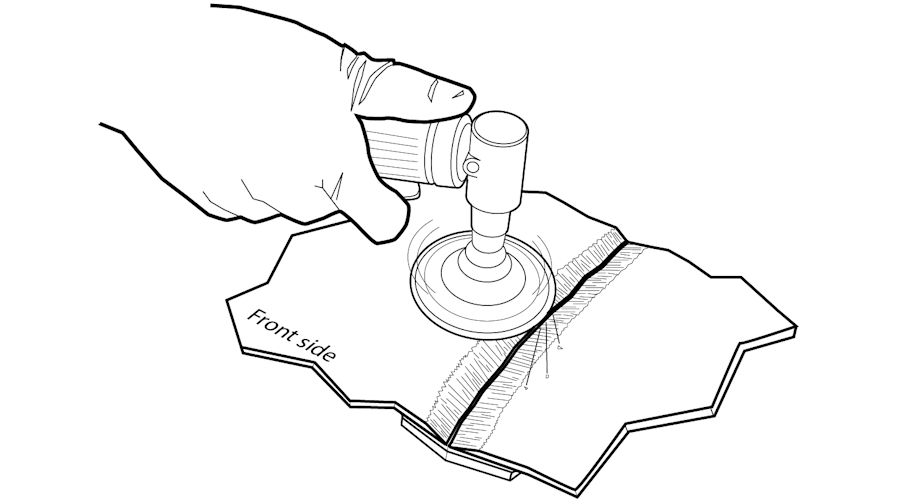
Once the adhesive on the backside is cured, peel the aluminum tape off the front and grind a v-groove about 1”-2” wide with a die grinder and/or a coarse sanding disc. Sandscratch the inside of the v-groove coarsely. Round off any sharp edges and feather the paint back with 80 grit in a DA.

If the material is TEO, TPO, or PP, apply adhesion promoter as was done on the backside.

Apply adhesive

Mix the two-part adhesive and apply into the v-groove with a body spreader. Slightly overfill the v-groove so that it can be sanded flush when finished.

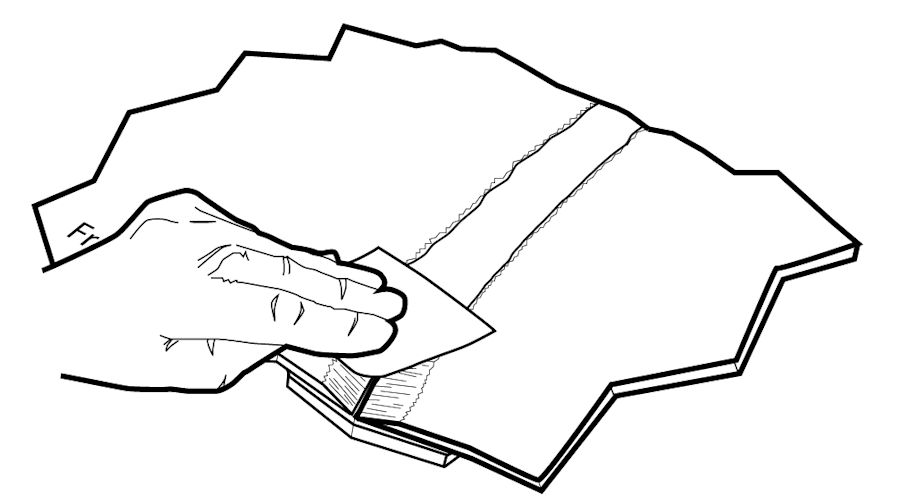
When the adhesive on the front side is fully cured, sand with 80 grit in a DA sander, then progress to finer grits to finish.

plasticwelder polyvance nitrogen welder polyvance bumper repair plastic tank welding polyvance plastic welding kit

Products Suggestions

SMC Hardset Epoxy Filler, Tube Kit
2020-T
$ 28.95
2510 PlastiFix Adhesive
2510
$ 56.95
EcoPrep Cleaner, 32oz Sprayer
1001-4
$ 22.95
Tweet
QR Code for this page
qr code
Use your smartphone`s scanner to share this page with a friend.
Quick Links
  • About Us
  • Contact Us
  • International Distributors
  • Newsletter
  • Nitro Fuzer Distributors
  • Private Label
  • Terms and Conditions
  • Testimonials
  • Time Line
Our other sites
  • dBumper
  • Facebook
  • Instagram
  • LinkedIn
  • Pinterest
  • TikTok
  • Twitter
  • YouTube Channel
  • br.polyvance.com
  • polyvance.mx
Other Links
Collision Education Foundation

©1997-2025 - Polyvance

Programming and design:

CodeIT